If you're looking for a way to add character and style to your home, one of the best ways is by creating a gallery wall. Not only will it help to show off your unique sense of style, but it can also be a great conversation starter and way to bring life into any room. In this article, we'll look at some of the best ways to arrange a gallery wall in your home.
What is a gallery wall?
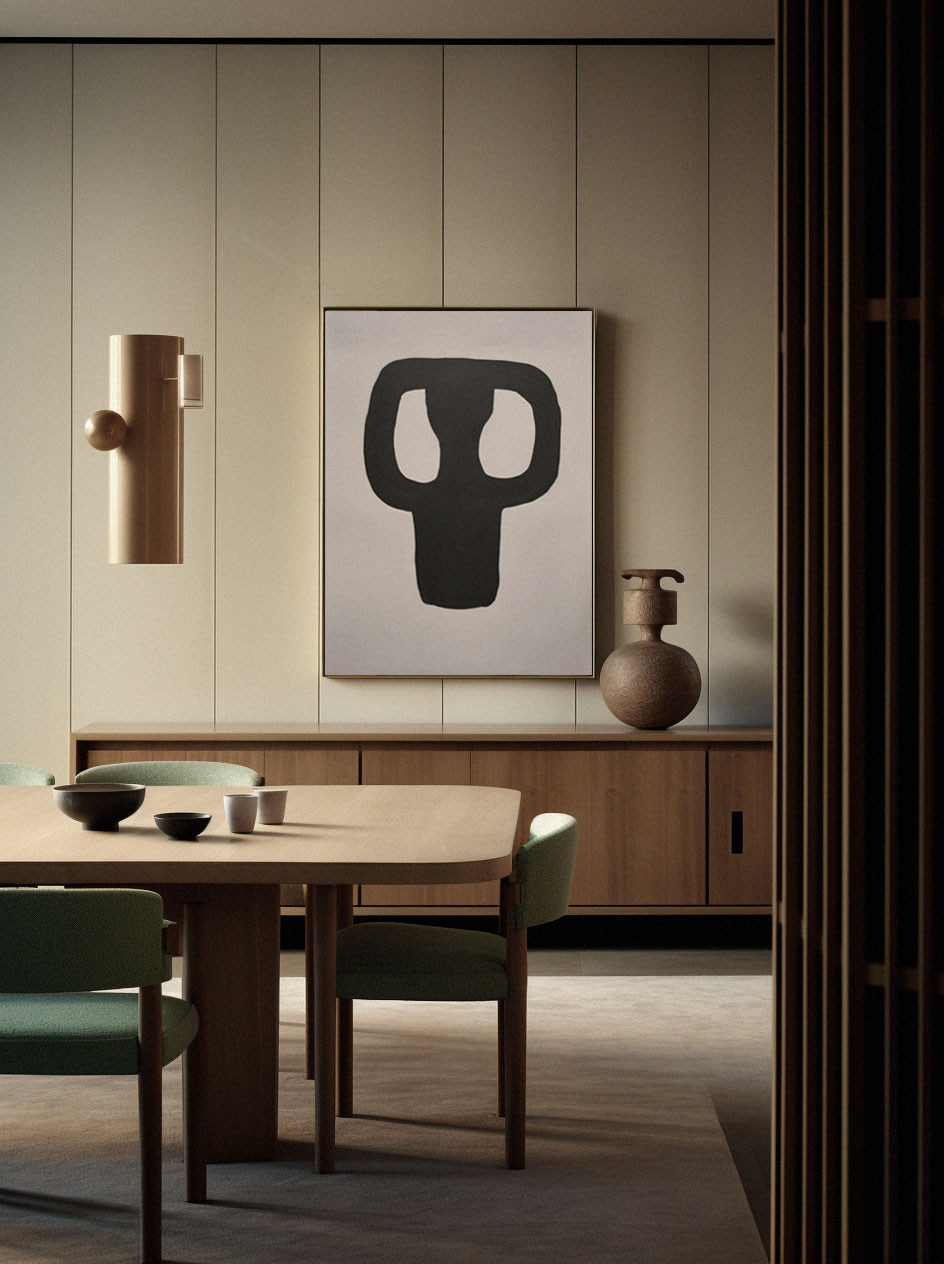
A gallery wall is a collection of photos, artwork, or other wall-mounted decor that is arranged together to create a cohesive display. It can be a mix of family photos, personal artwork, and/or thrifted finds. The key to creating a successful gallery wall is to choose pieces that complement each other in terms of both style and subject matter.
When planning your gallery wall, start by sketching out a rough idea of where each piece will go. Then, begin arranging the pieces on the floor or another flat surface until you’re happy with the overall layout. Once you have the perfect arrangement, use painter’s tape or command strips to secure the pieces to the wall.
There are no hard-and-fast rules when it comes to designing a gallery wall. However, there are a few general tips to keep in mind:
- Stick to a single color scheme or theme
- Vary the sizes, shapes, and frames of the pieces
- Use odd numbers for an asymmetrical look
- Balance empty space with clusters of items
Creating a gallery wall is a great way to add personality to your home décor. With careful planning and a little bit of creativity, you can achieve any look you desire!
Gallery Wall Rules
1. Start with the biggest piece: When you’re hanging a gallery wall, the first step is to find the largest piece of art or photography. This will be the anchor for your entire arrangement.
2. Work in odd numbers: Once you have your anchor piece, it’s time to start adding in other pieces. But stick to an odd number of items on your wall—it looks more aesthetically pleasing than an even number.
3. Create a grid: To keep your gallery wall looking neat and tidy, try to create a grid-like pattern as you hang each piece. This means that each item should be spaced out evenly from the others.
4. Mix up the sizes: To add visual interest to your gallery wall, mix up the sizes of the pieces you hang. Don’t worry about making everything perfectly symmetrical—a little bit of asymmetry can actually be quite eye-catching!
5. Hang at eye level: When choosing where to hang each piece on your gallery wall, make sure that they’re all at approximately eye level. This will help create a cohesive look and feel for your arrangement
Do You Need the Same Size Frames for the Gallery Wall?
Typically, you'll want to use frames that are all the same size for your gallery wall. This creates a clean, cohesive look that will really make your photos and art pop. However, there are a few instances where you might want to mix things up and use different sized frames.
If you're hanging a collection of photos, for example, you might want to use different sizes of frames to create interest and add visual appeal. Just be sure to hang the larger frames first and work your way down to the smaller ones.
Another time you might want to use different sized frames is if you're hanging artwork that comes in different sizes. In this case, it's best to choose one frame size that will fit all of the pieces and then mat each piece so it fits nicely inside the frame. This way, everything looks uniform and put together.
So, there's no hard and fast rule when it comes to using the same size frames for your gallery wall. It really depends on what look you're going for and what types of pieces you're hanging. Just use your best judgement and have fun creating something unique!
For a Neat and Organized Look, Stick with About Fifteen Frames Per Wall
A gallery wall is a great way to show off your favorite photos, art, and other mementos. But if you want your gallery wall to look neat and organized, stick to about fifteen frames per wall.
Too many frames on one wall can look cluttered and chaotic. But a few well-placed frames can create a stylish and cohesive look. So take some time to plan out your gallery wall, and consider limiting yourself to fifteen frames or less.
Arranging Your Frames: Horizontal or Vertical?
When it comes to arranging your frames on a gallery wall, you have two main options: horizontal or vertical. Which option you choose will ultimately come down to personal preference, but there are a few things to keep in mind that may help you make your decision.
Horizontal arrangements are typically more relaxed and informal, while vertical arrangements tend to be more formal and structured. If you're not sure which way to go, try playing around with different arrangements on paper or using painters tape to map things out before making any holes in your walls.
Another thing to consider is the size and shape of the frames you're using. Horizontal arrangements work well with long, narrow frames, while vertical arrangements are better suited for shorter, squarer frames. Again, it's all about what looks best to you!
Some Ideas to Consider When Putting Your Gallery Wall Together
-Choose a theme or style for your gallery wall. This will help you determine what type of artwork or décor to include.
-Create a mood board or Pinterest board to get an idea of what you want your gallery wall to look like.
-Think about the overall aesthetic you want to achieve and how the gallery wall will fit into the rest of your home’s décor.
-Once you have a general idea of what you want, start gathered items for your gallery wall. This can be anything from artwork and photos to frames and other décor items.
-Layout your items on the floor or a large table before hanging them up. This will help you get an idea of how everything will look together and allow you to make changes if needed.
-Use painters tape or removable adhesive hooks to temporarily hang items on the wall so you can get an accurate placement before making any holes.
-When putting nails or screws into the wall, be sure to use a level so your frames are straight.